Choosing a task or creating a field
task("name")- Open a task from the bundled set.
field(width=8, height=6)- Open a Robot field without tying it to a task.
For computer science teachers
Robot is designed to teach programming fundamentals and helps develop algorithmic thinking. Students write small Python programs: they move the Robot across a grid, paint cells, and check for walls and already-painted cells. All of this is visible in the simulator window and runs locally.
Robot is aimed at school students who are just starting to program. Tasks are small problems on a clear field. Students write command sequences, loops, conditions, and functions while seeing the result of their code right away.
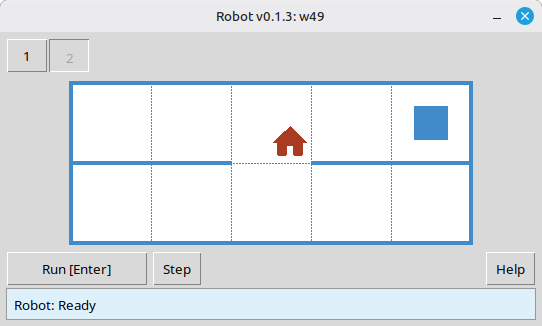
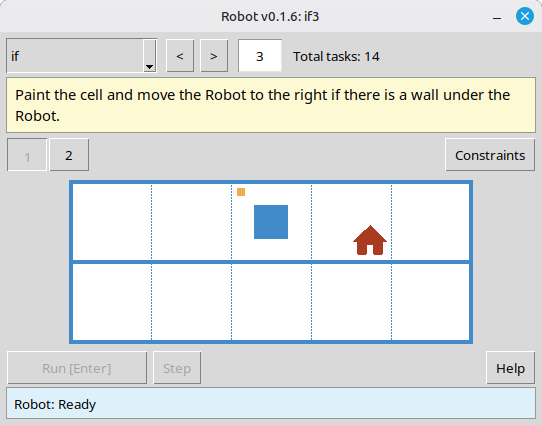
Walls, marked cells, and the goal cell are visible from the start, so it is easier for students to see what the program should do.
The result of the program is checked automatically. Students immediately see whether the solution passed and can fix the error themselves.
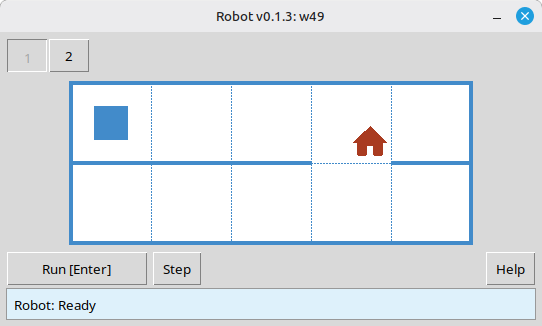
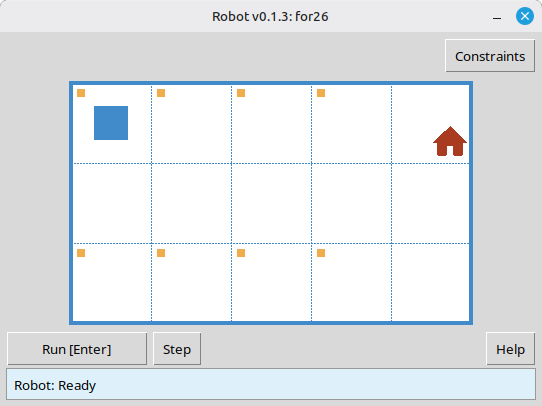
Many tasks include several environments. One program has to pass every variant, so students need to devise a general algorithm for the task.
Students can open each environment before writing code and see which cases their solution must handle.
Programs can run one command at a time in the Robot window. This is useful for debugging and for explaining a solution on a projector.
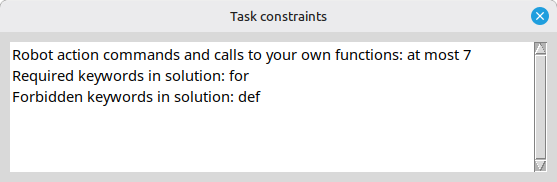
Some tasks limit commands or language constructs. The constraints help guide students toward the intended idea, such as a loop.
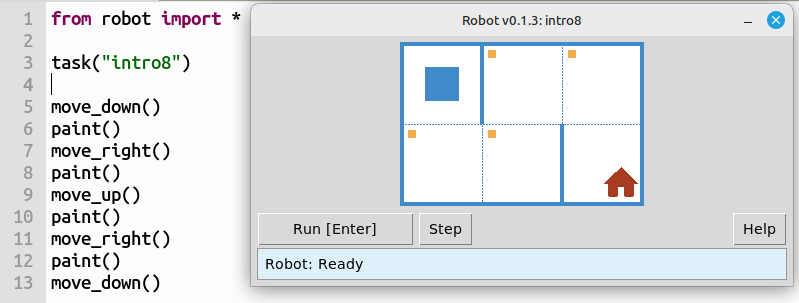
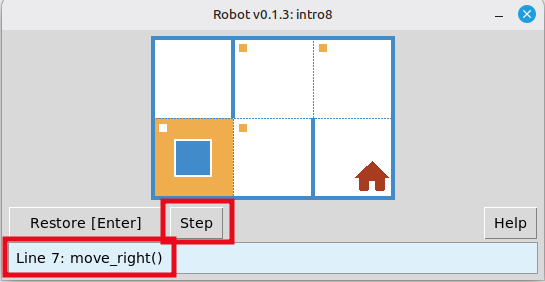
intro8: reach the house and paint every marked cell.When all environments are passed successfully, a message about it is displayed in the Robot simulator window. Students do not have to wait for the teacher to check their work.
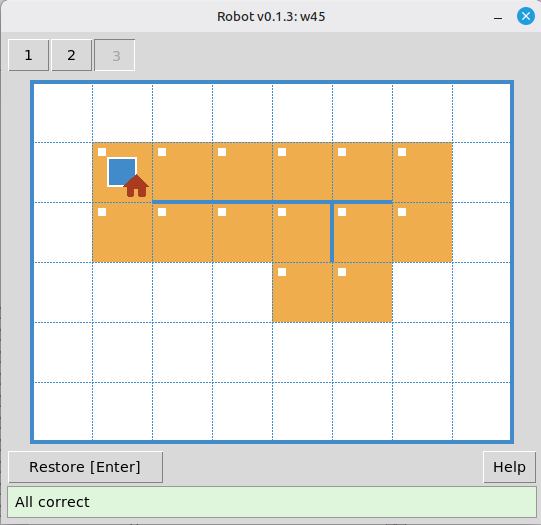
The environment selector lets students inspect each field variant before they plan a solution that works everywhere.
Step mode shows what each command does. It is useful for self-checking and for walking through a solution with the class.
If a task has constraints, they are displayed in the Robot simulator window next to the task condition. Students can see which tools they are expected to use.
The separate task viewer opens the task catalog without running a student solution. A teacher can choose a topic, jump to a task number, read the condition, inspect every environment, and see the constraints. It is useful for lesson preparation and for showing a task on a projector.
if3).After you introduce a topic, students work through tasks at their own pace. Automatic checking removes part of the routine review for teachers: you can see who needs help and who can already move on.
for12 or w25.task("…") and improve their program until every environment passes.Tasks are grouped by topic, so they can fit into an existing course plan.
intro1 … intro24fun1 … fun20for loop – for1 … for28for + functions – forfun1 … forfun9while loop – w1 … w51while + functions – wfun1 … wfun12if – if1 … if14while + if – wif1 … wif15if / else – ifelse1 … ifelse10compound1 … compound11
You can import everything with from robot import * or import only the names you need.
from robot import *

task("intro8")

move_down()
paint()
move_right()
paint()
move_up()
paint()
move_right()
paint()
move_down()task("name")field(width=8, height=6)move_right()move_left()move_up()move_down()paint()printn(value)is_free_left() … is_free_down()is_wall_left() … is_wall_down()is_cell_painted()is_cell_not_painted()pol()Task conditions, the Robot simulator window, and help text are available in the languages listed below. The language is selected automatically based on the operating system's interface language.
robot module. You can start from sample_solution.py in the archive.task(). The task names are listed in the tracks above.viewer/viewer.py from the module archive.
Requirements: Python 3.7+ and the standard library. The Robot window uses tkinter. The tkinter module is included with most desktop Python installations.